


The holiday season wouldn’t be complete without a sweet, salty, and utterly irresistible treat, and Christmas Cracker Candy is just that! This simple yet decadent candy brings together the perfect combination of crunchy saltine crackers, rich caramel, and smooth chocolate. It’s a festive delight that’s nearly impossible to stop eating once
Christmas Cracker Candy is a crowd-pleaser that requires minimal ingredients and effort, making it the perfect choice for holiday gatherings, gift-giving, or just enjoying at home. Each bite offers a satisfying contrast of textures—from the crisp crackers to the creamy chocolate coating, all enhanced by a rich caramel layer.
Whether you’re hosting a holiday party or looking for a last-minute treat to bring to a family gathering, this candy will surely steal the spotlight. Let’s dive into this easy-to-make yet irresistible recipe!
Why You’ll Love This Recipe
Christmas Cracker Candy is all about simplicity and flavor. It’s a no-bake candy that offers both sweet and salty goodness, making it a versatile treat for any occasion. The caramel gives it a deep flavor while the chocolate coating brings in that rich, smooth texture. Plus, it’s customizable, allowing you to top it with nuts, sprinkles, or sea salt for extra flair!
Ingredients Overview
This recipe features just a few ingredients that come together to create a memorable holiday treat. Saltine crackers provide the perfect crisp base, while the homemade caramel sauce—made with butter, brown sugar, and a touch of salt—gives it that irresistible sweetness. High-quality semi-sweet chocolate rounds out the flavor, ensuring each bite is as satisfying as the last.
How to Make the Recipe
Step 1: Preheat the oven to 400°F. Line a 10×15-inch jelly roll pan with nonstick aluminum foil, ensuring it covers the bottom and sides completely. Arrange the saltine crackers in a single layer on the pan.
Step 2: In a medium saucepan, combine the brown sugar, butter, and salt. Cook over medium heat, stirring frequently, until the butter melts and the mixture begins to boil. Stir for 3–5 minutes, then remove from heat and stir in the vanilla extract.
Step 3: Pour the hot caramel mixture over the crackers, spreading it evenly to coat all of them. Place the pan in the oven and bake for 5 minutes, until the caramel is bubbly and hot.
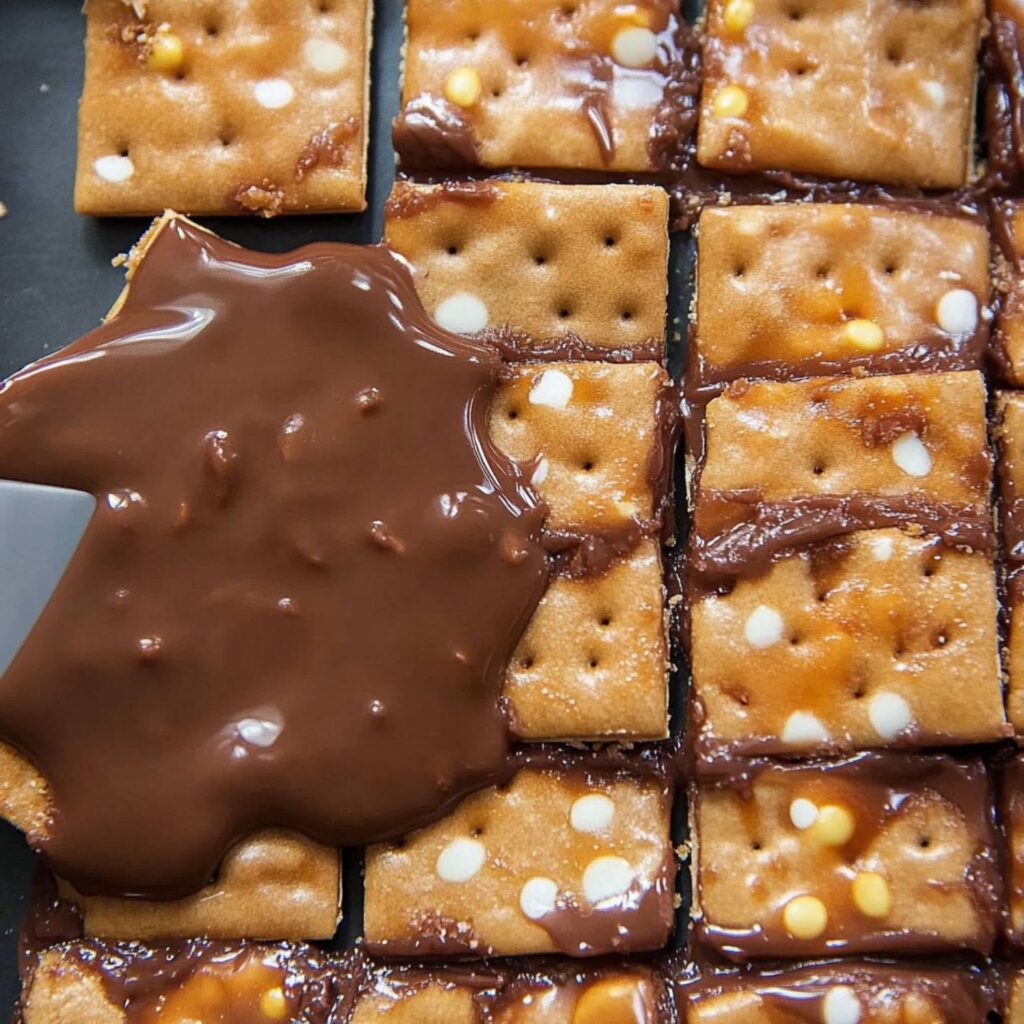
Step 4: While the caramel is baking, melt the chocolate. Place the chopped chocolate in a microwave-safe bowl and microwave in 30-second intervals, stirring each time, until fully melted (about 1 ½ minutes total).
Step 5: Once the caramel is done baking, remove the pan from the oven and allow it to cool for 1 minute. Then, pour the melted chocolate over the crackers, spreading it evenly with a spatula.
Step 6: Allow the candy to cool to room temperature, then transfer it to the refrigerator to chill overnight.
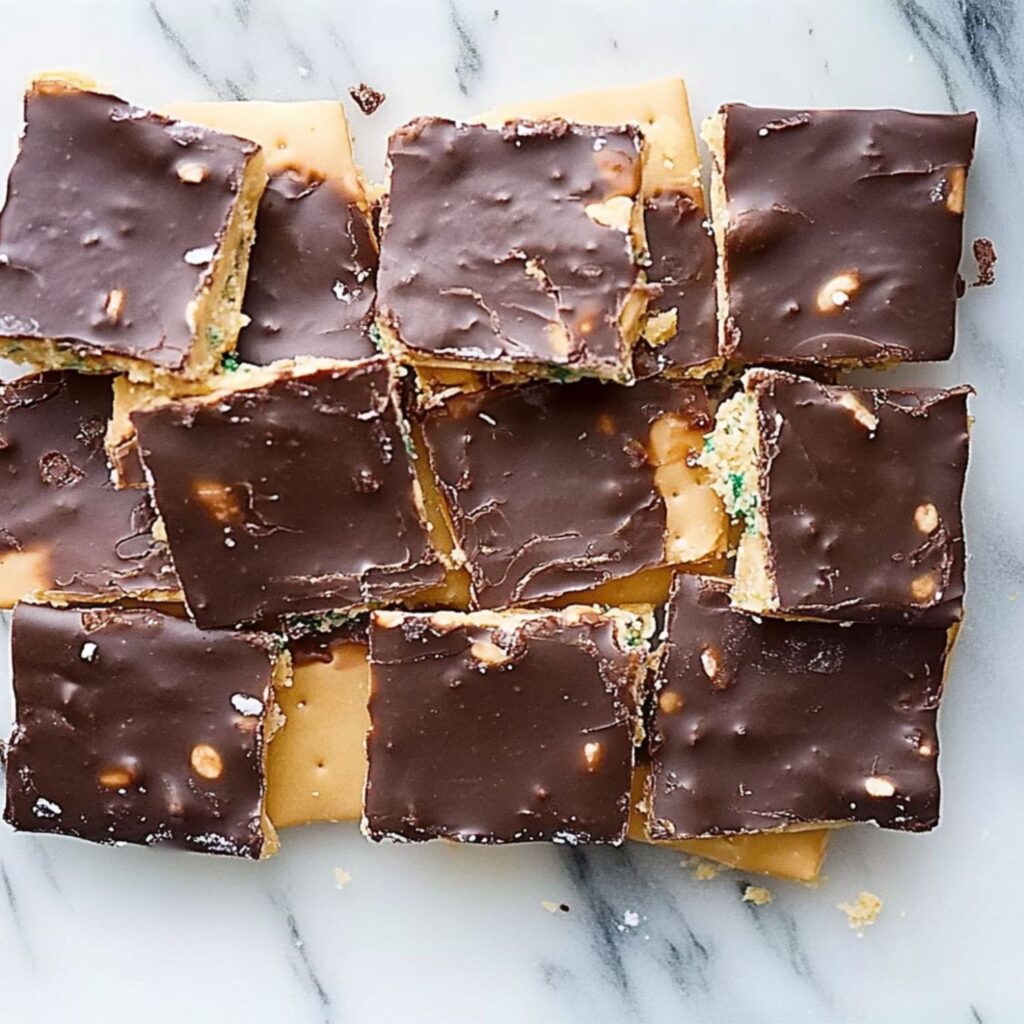
Step 7: Once chilled, remove the candy from the pan and peel away the foil carefully. Cut the candy into pieces or break it into shards by hand. Store in an airtight container in the refrigerator for up to a week, or in the freezer for up to 2 months.
Tips for the Best Recipe
- Ensure the caramel comes to a full boil for the right consistency—don’t rush it!
- Use chopped chocolate rather than chips for a smoother melt and better adhesion to the caramel.
- Allow the caramel to cool for only one minute before adding the chocolate to ensure the layers stick together.
- For a crunchier texture, top your candy with a sprinkle of Maldon sea salt or your favorite nuts.
Variations to Try
- Swap the saltines for Ritz crackers for a buttery flavor.
- Add a drizzle of white chocolate for a festive look and extra sweetness.
- Mix in chopped nuts, coconut flakes, or crushed pretzels to add texture and flavor to the topping.
Frequently Asked Questions (FAQs)
- Can I use a different type of cracker?
Yes! While saltine crackers work best for their crispness, Ritz crackers or graham crackers also make great alternatives. - Can I use milk chocolate instead of semi-sweet?
Absolutely! Milk chocolate will make the candy sweeter, so feel free to use your preferred type of chocolate. - How long does the candy last?
Store your Christmas Cracker Candy in an airtight container in the fridge for up to a week. For longer storage, freeze it for up to 2 months. - Can I add toppings to the candy?
Definitely! Once the chocolate is spread, try sprinkling crushed nuts, dried fruit, or even candy canes for a festive touch. - Is it necessary to refrigerate the candy?
Yes, refrigerating the candy helps it set properly and prevents the layers from separating.

How to Store and Reheat
- Storage: Keep the candy in an airtight container in the fridge for up to a week or in the freezer for up to 2 months.
- Reheating: If stored in the freezer, let the candy warm up at room temperature for about 10 minutes before breaking into pieces.
Conclusion
Christmas Cracker Candy is the ultimate holiday treat that’s both easy to make and hard to stop eating. With its sweet, salty, and crunchy layers, it’s the perfect snack for festive celebrations or a cozy night in. The best part? It can be customized to suit your tastes, so you can make it just the way you like.
Don’t forget to follow me on Pinterest at Ava Foodie for more holiday treats and delicious recipes. Whether you’re making this for your family or gifting it to friends, this candy will surely become a holiday favorite.