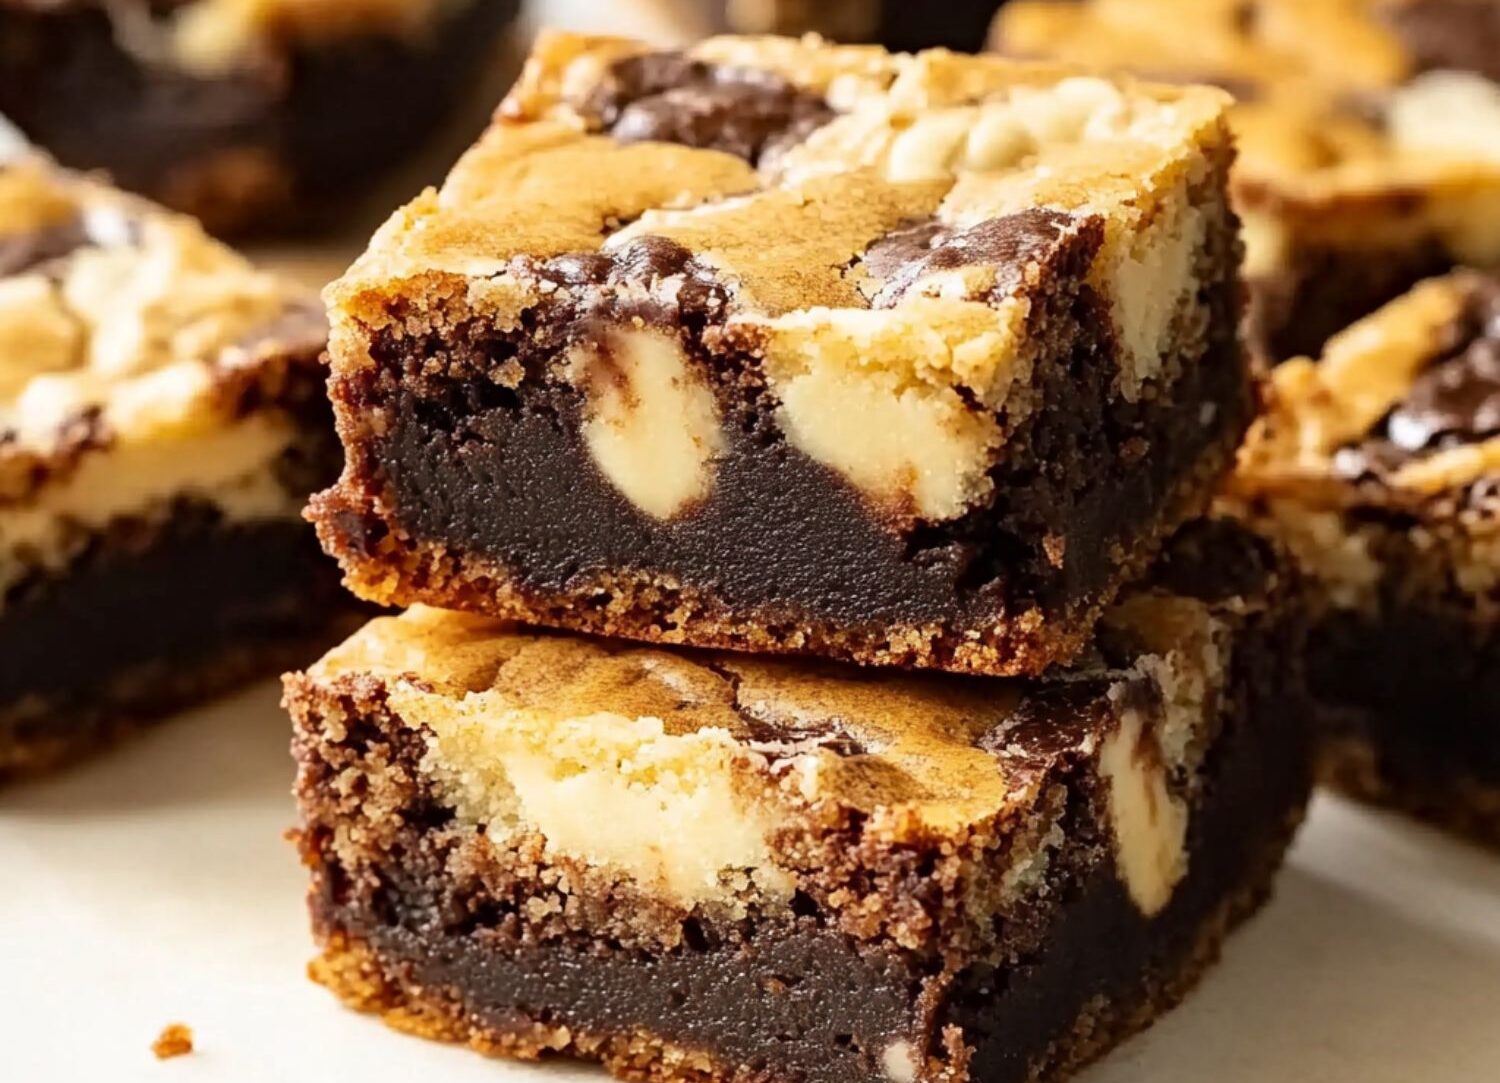

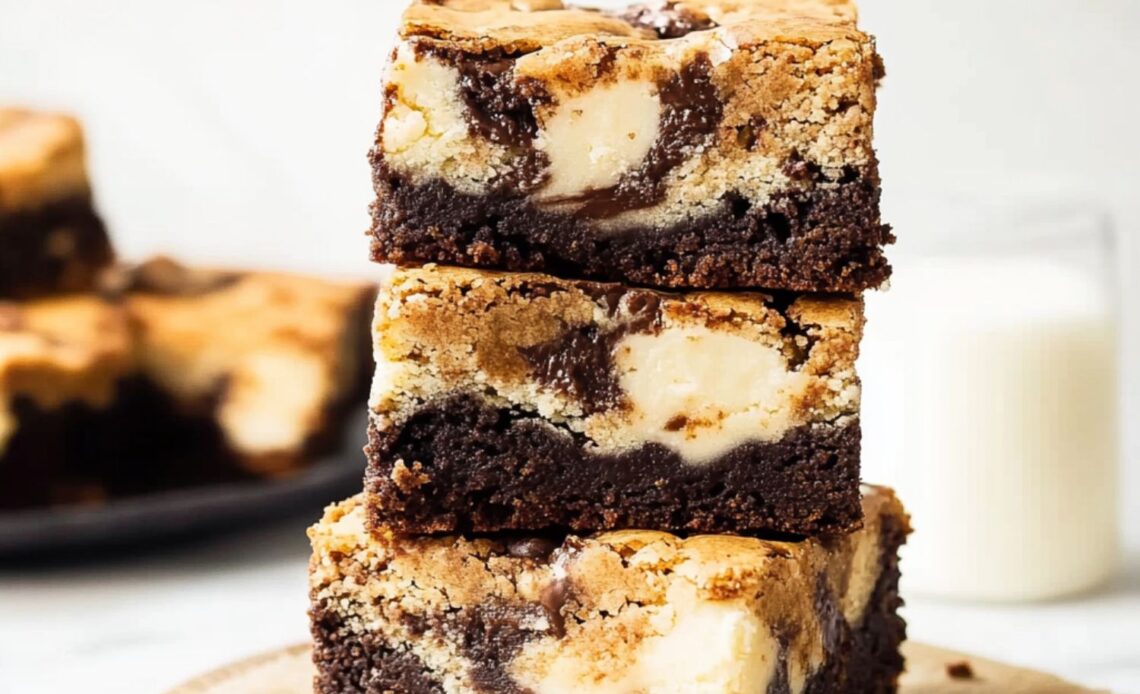
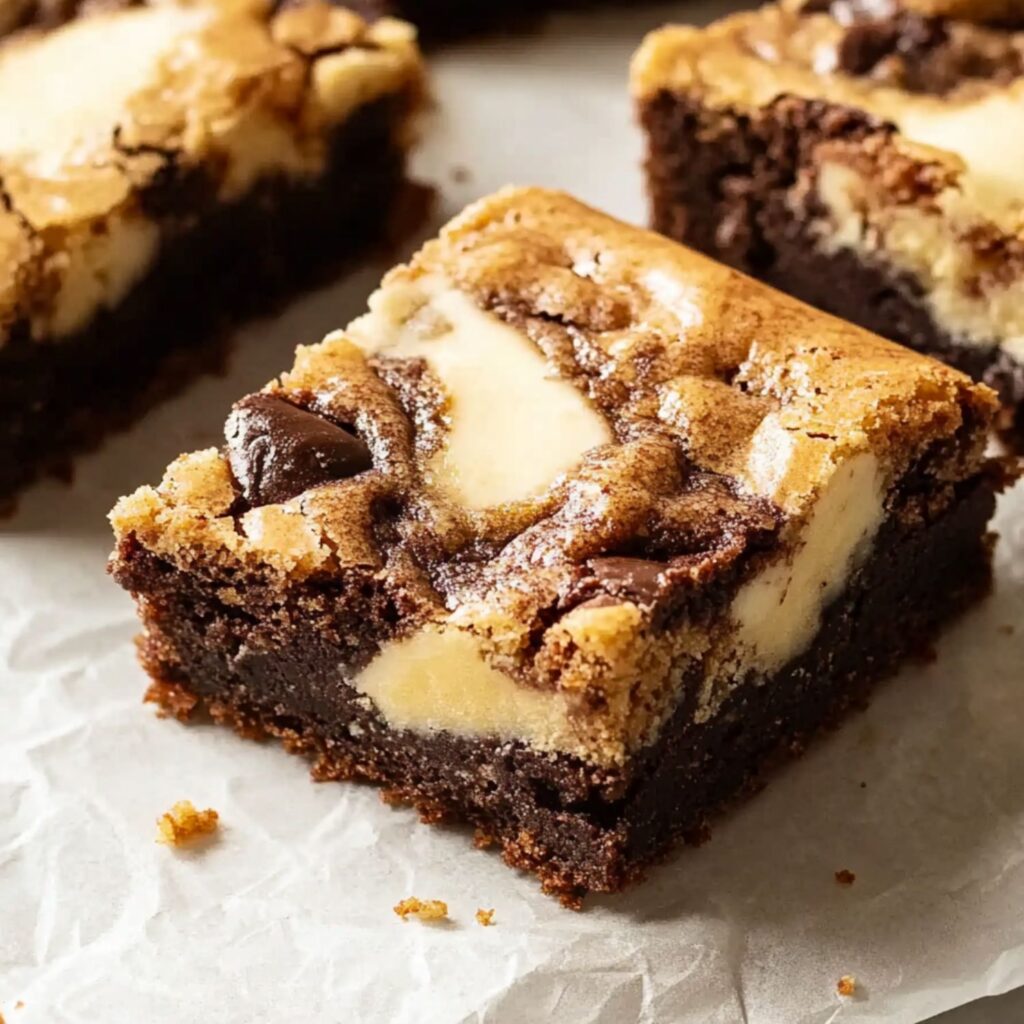
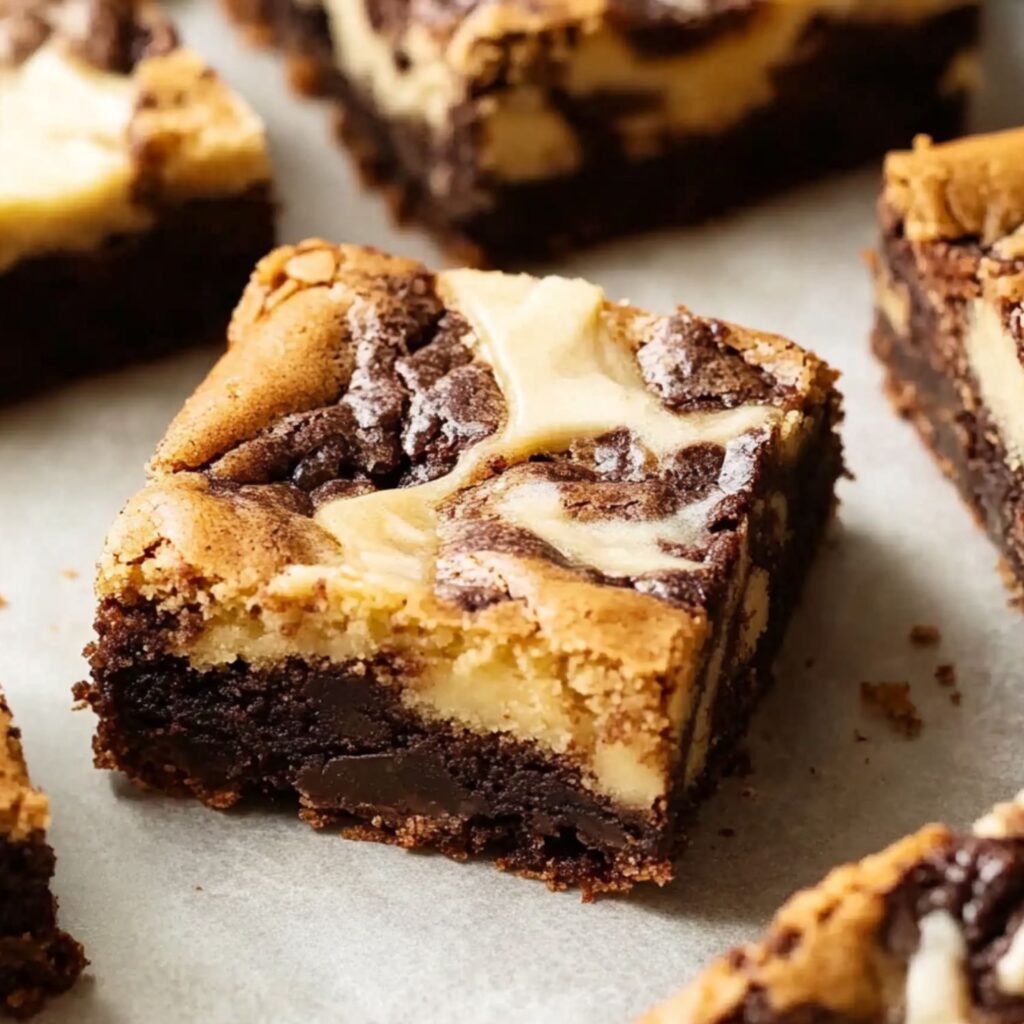
Imagine the perfect balance of sweet vanilla and rich chocolate in one bite. That’s what you’ll experience with these Marble Blondies. This decadent treat combines the soft, chewy texture of a vanilla blondie and the fudgy, gooey goodness of a chocolatey brownie, all swirled together to create an irresistible marbled effect. If you’re indecisive when choosing between blondies and brownies, this recipe offers the best of both worlds in one pan. It’s the perfect dessert for anyone who craves variety with every bite.
The beauty of these Marble Blondies lies in their simplicity and versatility. By using a single batter, you’re able to create two distinct layers: the caramelized flavor of the vanilla blondie, complemented by the deep richness of the chocolate brownie. Each bite offers something different, yet harmoniously balanced. With white chocolate chips in the blondie batter and semi-sweet chocolate chips in the brownie batter, the contrast between flavors and textures is truly mouthwatering.
These Marble Blondies are the ideal treat for every occasion, from casual get-togethers to special celebrations. With their stunning marbled appearance and delectable taste, they’re sure to impress your friends and family. Whether served warm with a scoop of vanilla ice cream or enjoyed at room temperature, these blondies will quickly become a favorite in your recipe collection.
Why You’ll Love This Recipe
These Marble Blondies are a dream come true for dessert lovers. Not only do they offer the best of both worlds, but they also boast a rich, layered texture with chewy edges and a fudgy center. The simplicity of using one batter to create two flavors allows for a fun twist on traditional blondies and brownies. The combination of vanilla and chocolate creates a deliciously complex flavor profile that’s both sweet and satisfying without being overly rich. Plus, they’re incredibly easy to make, so you won’t have to spend hours in the kitchen to enjoy this treat.
Ingredients Overview
The ingredients for these Marble Blondies are pantry staples, with a few key additions to elevate the flavor. The use of light brown sugar ensures a moist, caramel-like texture in the blondie layer, while the semi-sweet chocolate and Dutch-process cocoa provide depth in the brownie layer. The white chocolate chips and espresso powder offer delightful complexity to the flavors, making each bite a truly indulgent experience. Whether you choose to swap in nuts or experiment with different chocolate varieties, the recipe is versatile enough to suit your preferences.
How to Make the Recipe
Step 1: Prepare the Oven and Pan
Preheat your oven to 350°F (175°C) and place a rack in the middle. Grease a 9-inch square baking pan with nonstick spray and line it with parchment paper, leaving an overhang on two sides. This will make it easier to remove the blondies once baked. Lightly spray the parchment paper to ensure the batter doesn’t stick.
Step 2: Whisk the Wet Ingredients
In a large mixing bowl, combine the melted butter, brown sugar, granulated sugar, eggs, and vanilla extract. Use a whisk to beat the mixture until it’s smooth, glossy, and free of lumps. This process should take about 2 minutes, ensuring everything is well incorporated. The batter should look creamy and lightened in color.
Step 3: Mix the Dry Ingredients
In another large bowl, whisk together the flour, baking powder, and salt. This will ensure that the leavening agents are evenly distributed throughout the batter. You need a separate bowl to prevent clumping of dry ingredients. Set this bowl aside for later use.
Step 4: Combine Wet and Dry Ingredients
Slowly fold the dry ingredients into the wet ingredients using a rubber spatula. Mix until just combined, making sure there are no visible streaks of flour. Avoid over-mixing, as this could result in dense blondies. The batter should be thick and smooth.
Step 5: Make the Brownie Batter
Take one-third of the blondie batter and transfer it to the bowl you previously used for the dry ingredients. Add the melted chocolate, cocoa powder, espresso powder, and egg yolk. Stir until everything is well combined, creating a rich, chocolatey brownie batter.
Step 6: Add the Chocolate Chips
Divide the white chocolate chips and semi-sweet chocolate chips into two portions. Gently fold the white chocolate chips into the blondie batter and the semi-sweet chocolate chips into the brownie batter. This ensures an even distribution of chocolate in both batters, adding texture and sweetness.
Step 7: Layer the Batters in the Pan
Drop alternating spoonfuls of both the blondie and brownie batters into the prepared pan. Use about half of each batter for the first layer, ensuring a checkerboard pattern. Gently spread the batters to create an even layer before adding the second layer of remaining batter. Repeat the process for the second layer.
Step 8: Swirl the Batters
Use the side of a small offset spatula or the spine of a butter knife to gently swirl the two batters together. Be careful not to over-swirl as it could result in a muddled appearance. Aim for a delicate marbled effect that remains distinct after baking. Quick, confident motions work best to create the perfect swirl.
Step 9: Bake and Cool
Place the pan in the preheated oven and bake for 30 to 40 minutes. The blondies are done when they’ve risen, set, and a toothpick inserted comes out clean or with a few moist crumbs. Let the blondies cool in the pan for 15 minutes before lifting them out using the parchment paper. Cool completely on a wire rack before slicing into squares.

Tips for the Best Recipe
- Don’t over-swirl the batters; a few quick strokes should create the marbled effect without blending the two too much.
- If you prefer a more intense chocolate flavor, swap out the semi-sweet chocolate chips for bittersweet chocolate.
- For extra texture, consider adding toasted nuts, like walnuts or pecans, in place of white chocolate chips.
Variations to Try
- Add a swirl of your favorite nut butter, like peanut butter or almond butter, for an extra layer of richness.
- Try using Nutella for a more indulgent twist on the chocolate batter.
- To make these blondies more festive, add colorful sprinkles on top before baking.
Frequently Asked Questions (FAQs)
Q1: Can I make these blondies ahead of time?
A1: Yes! These marble blondies keep well at room temperature in an airtight container for up to 4 days. For longer storage, wrap them tightly and freeze for up to 2 months.
Q2: Can I use a different type of chocolate?
A2: Absolutely! If you prefer milk chocolate or dark chocolate, feel free to swap it in for the semi-sweet chocolate in the recipe.
Q3: Can I add nuts to the batter?
A3: Yes, you can add chopped nuts such as walnuts or pecans for added texture and flavor. Just fold them into the blondie batter or sprinkle them on top before baking.
Q4: What can I use instead of eggs?
A4: You can substitute flax eggs or aquafaba (chickpea brine) if you need an egg-free alternative.
Q5: Can I make these gluten-free?
A5: Yes! Simply substitute the all-purpose flour with a 1:1 gluten-free flour blend, and you should be good to go.
How to Store and Reheat
Store leftover marble blondies in an airtight container at room temperature for up to 4 days. For longer storage, wrap them in plastic and place them in a freezer-safe container for up to 2 months. To reheat, microwave for a few seconds or let them come to room temperature for the best texture.
Conclusion
These Marble Blondies are the ultimate dessert for those who can’t decide between blondies and brownies. With their delightful swirl of vanilla and chocolate, each bite offers something special. Whether you’re baking for a special occasion or just indulging in a sweet treat, these blondies are sure to impress. Don’t forget to follow Ava Foodie on Pinterest for more delicious recipes like this one!