
Ice cream cakes have a special place in my heart, especially during celebrations. From childhood birthdays to festive gatherings, a Dairy Queen ice cream cake was always the centerpiece. I vividly remember the classic chocolate-vanilla layers with a layer of fudge and crunchy bits sandwiched between. As I got older, I even worked at Dairy Queen, building these cakes, which sparked my passion for creating my own ice cream cake recipes.
Now, after years of perfecting my ice cream cake techniques, I’m excited to share this Oreo Ice Cream Cake recipe. Inspired by one of my favorite flavors—cookies and cream—this cake combines everything I’ve learned about making ice cream cakes. The result is a rich, indulgent dessert that’s sure to be a hit at birthdays, summer BBQs, or any occasion that calls for something sweet and cold.
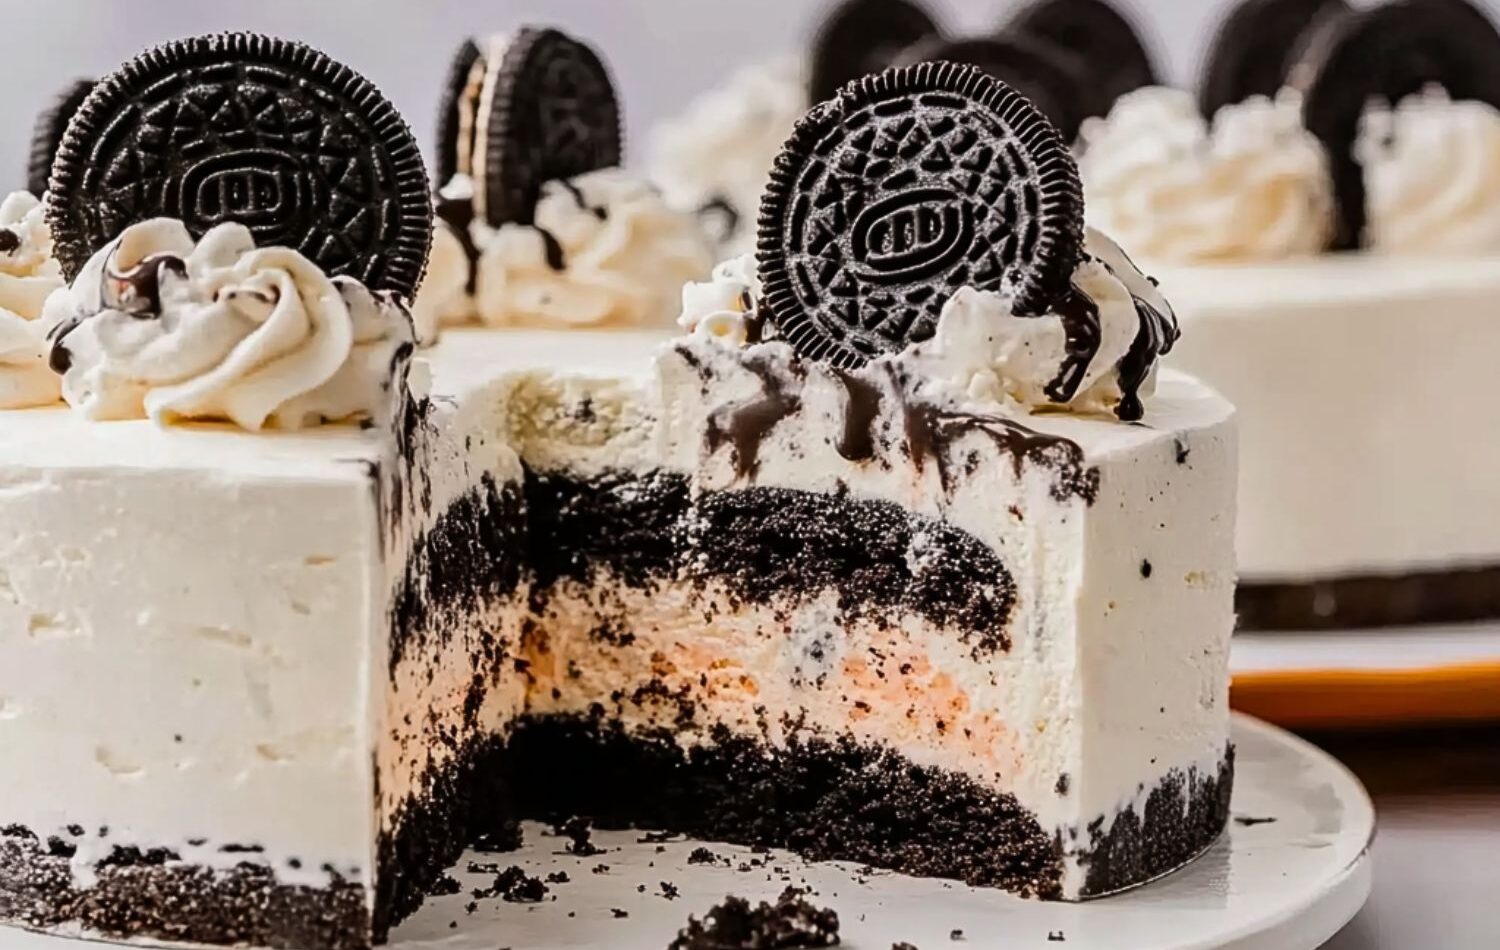
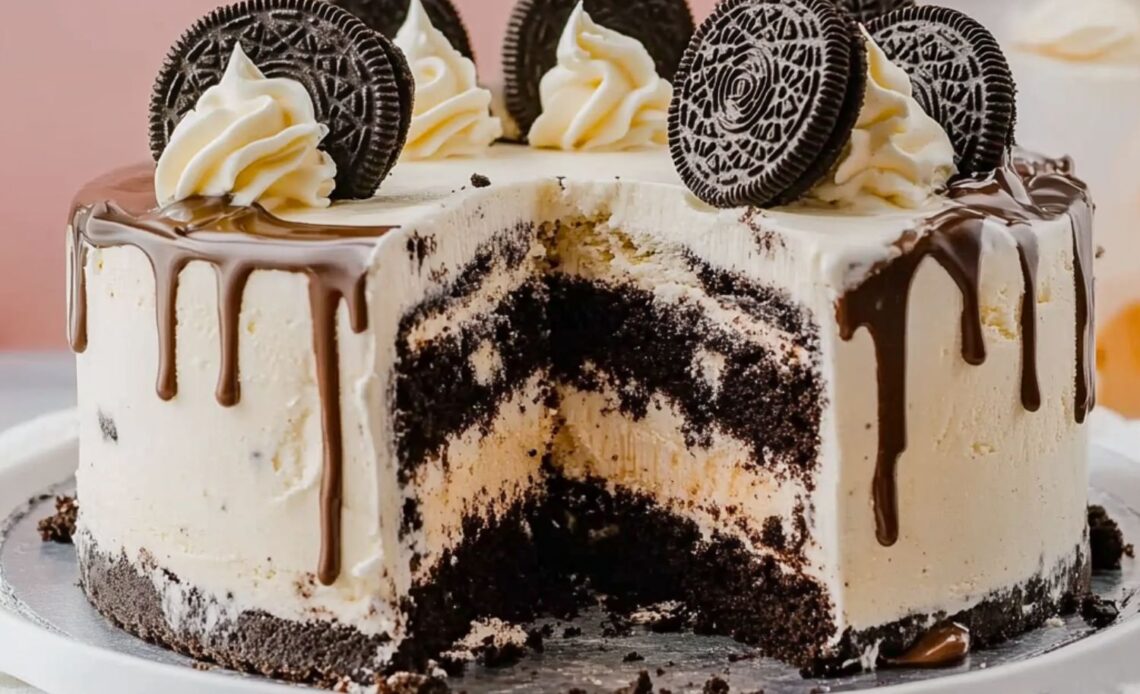
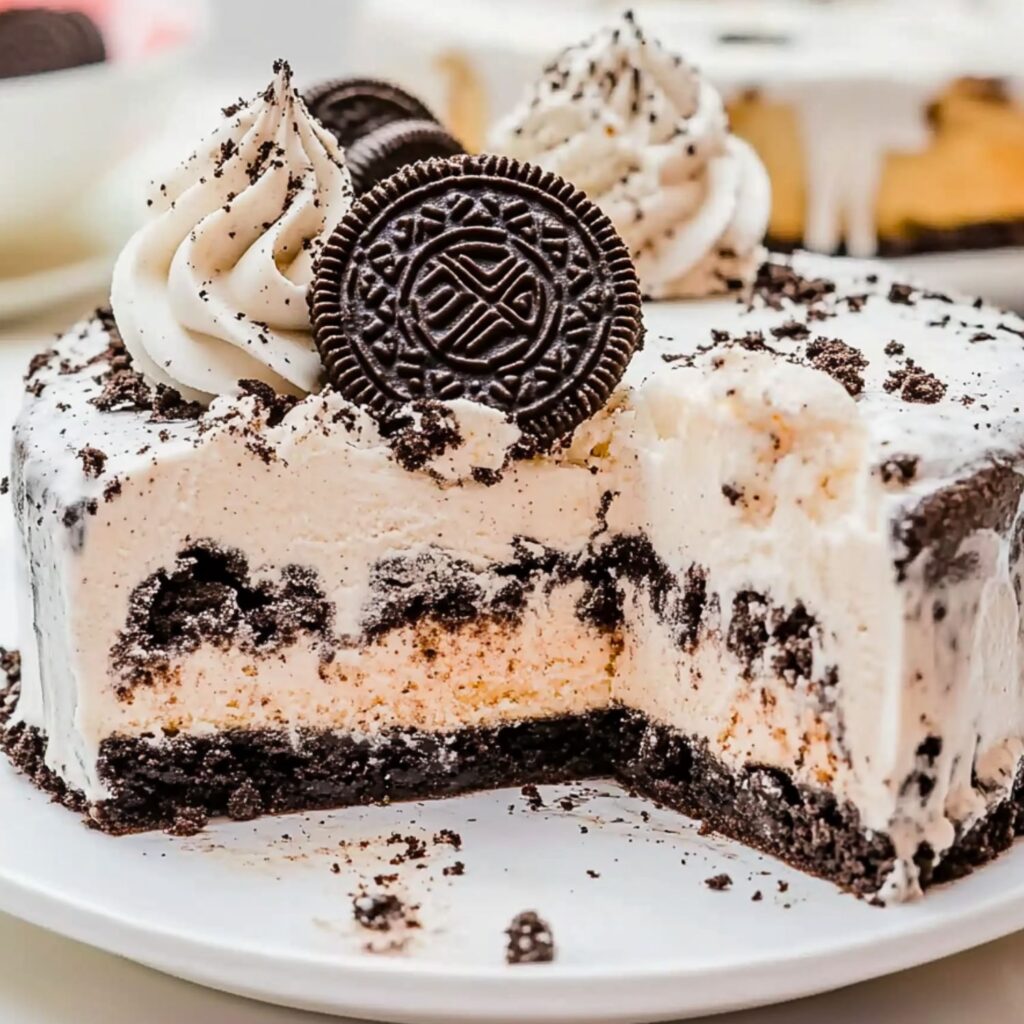
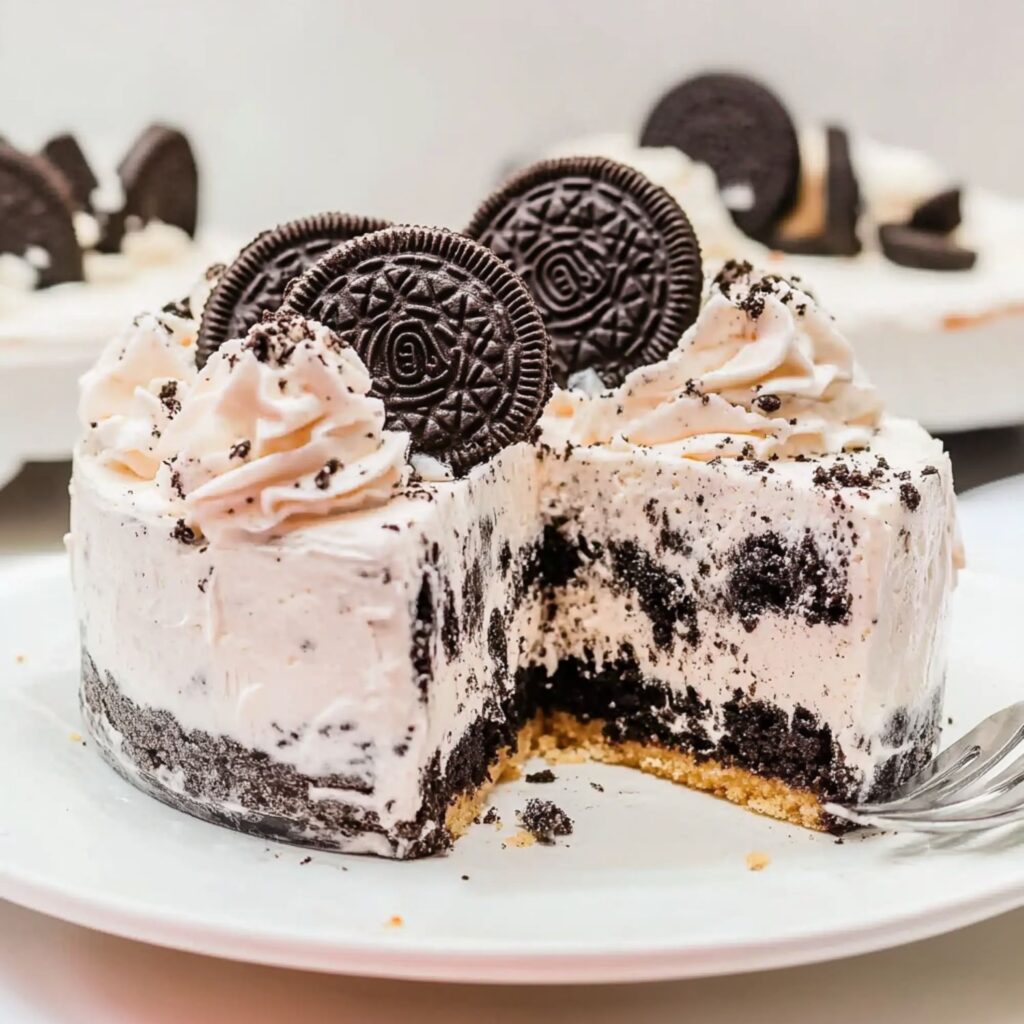
This Oreo Ice Cream Cake is a dessert dream come true for ice cream lovers, cookie fans, and everyone in between. It’s the perfect make-ahead treat, and with Oreo crumbles, smooth vanilla and cookies and cream ice cream layers, and that irresistible crunch, this cake has it all.
Why You’ll Love This Recipe
Oreo Ice Cream Cake combines the best of both worlds: ice cream and cake. It’s a fun twist on a traditional cake, layered with cold and creamy goodness and a satisfying crunch. If you’ve ever craved an ice cream cake but didn’t want to leave the house, this recipe is the perfect solution. It’s packed with the flavors of cookies and cream, and the Oreo crunch adds that familiar texture we all love from store-bought versions.
Not only is this ice cream cake rich in flavor, but it’s also a versatile dessert that can be customized to suit any taste. From different ice cream flavors to creative variations, the possibilities are endless. It’s also an excellent make-ahead dessert, freeing you up to enjoy your celebration without the last-minute stress.
And if you love Oreos, this recipe will elevate your obsession. Crushed Oreos mixed into the cake’s layers ensure that every bite is a cookie lover’s dream come true. It’s the kind of cake that can easily become a family tradition of its own.
Ingredients Overview
This Oreo Ice Cream Cake uses a few key ingredients that come together beautifully. The no-churn ice cream is the base, and crushed Oreos add the cookie crunch. Store-bought hot fudge topping makes the process easier, though you can opt for homemade fudge if you prefer. The cake also incorporates a layer of whipped cream for extra indulgence. You can mix and match ice cream flavors and even get creative with the toppings.
How to Make the Recipe
Follow these steps to create your perfect Oreo Ice Cream Cake:
Step 1: Prepare the Pan
Line an 8×3-inch round springform pan with plastic wrap. Make sure to cover both the base and the sides with separate sheets of wrap. Freeze the pan to keep the ice cream from melting during assembly.
Step 2: Make the No-Churn Ice Cream
Crush 6 Oreos in a resealable bag with a rolling pin and set aside. In a bowl, stir together sweetened condensed milk, vanilla extract, and salt. Whip heavy cream until stiff peaks form, then fold in the condensed milk mixture. Separate the whipped cream into two parts. Add crushed Oreos to one half, which will be the cookies and cream layer.
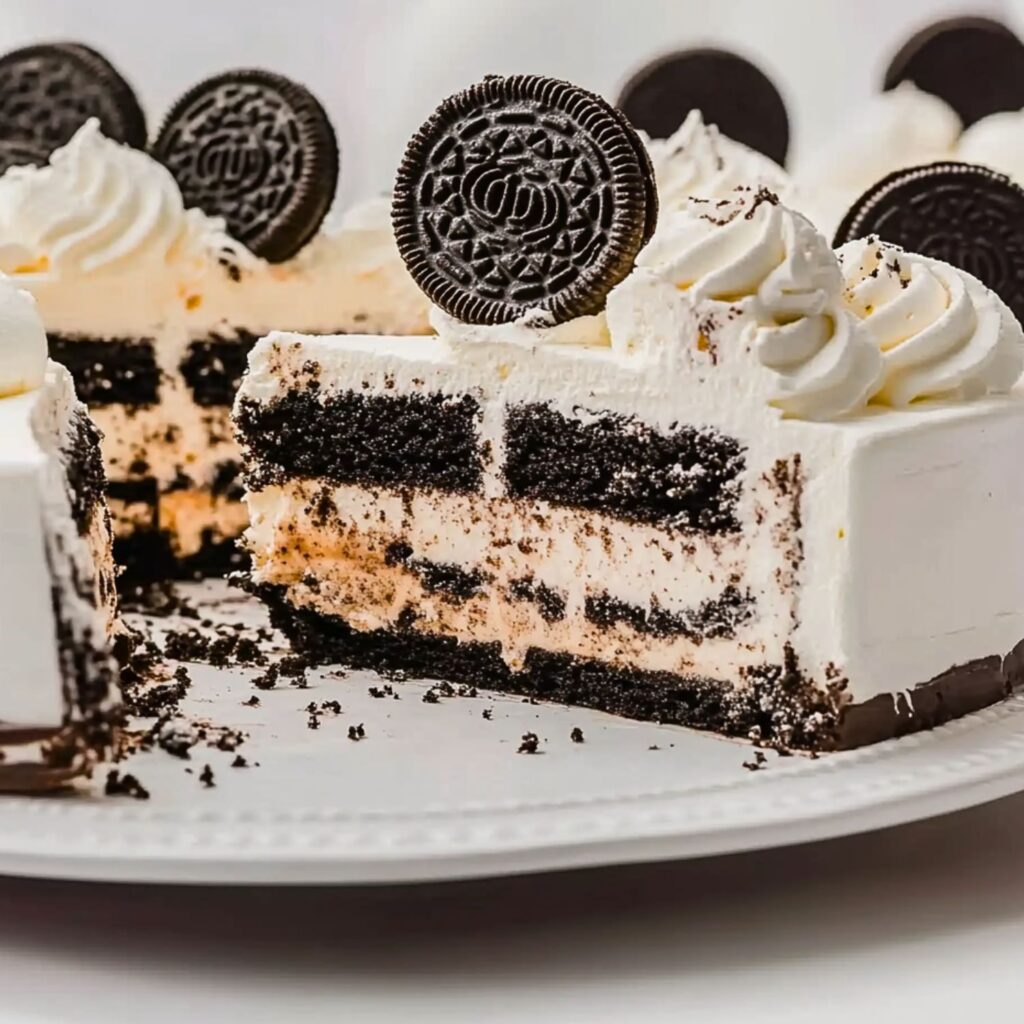
Step 3: Build the First Layer
Spread a thin layer of vanilla ice cream at the bottom of the prepared pan. Dip each of the 14 whole Oreos in milk until soaked but not falling apart. Arrange them in a single layer on top of the ice cream. Spoon any leftover milk over the Oreos and add the rest of the vanilla ice cream on top. Freeze until firm.
Step 4: Make the Crunchies
Crush 10 Oreos into small crumbs, then combine with melted butter and a pinch of salt. Spread the mixture on a baking sheet and bake for 8 minutes. If using, coat the cooled crumbs with chocolate shell for added texture. Set aside to cool.
Step 5: Add Fudge and Crunchies
Once the vanilla ice cream layer is firm, spread hot fudge over it. Add the Oreo crunchies on top of the fudge. Return the pan to the freezer for about 15 minutes to firm up the crunchies layer.
Step 6: Add the Final Layer of Ice Cream
Spoon the cookies and cream ice cream over the crunchies. Smooth it into an even layer and freeze the cake for at least 6 hours or overnight to solidify.
Step 7: Make the Whipped Cream
Whip the cream, powdered sugar, vanilla, and salt together until stiff peaks form. Set aside a cup of whipped cream for piping and use the rest to frost the cake.
Step 8: Unmold the Cake
Remove the cake from the freezer. Carefully peel off the plastic wrap and flip the cake onto a serving platter. Smooth the whipped cream across the top and sides, and decorate with the reserved whipped cream in a piping bag.
Step 9: Freeze Again
Return the cake to the freezer for about 15 minutes to set the whipped cream before serving.
Tips for the Best Recipe
- Freezer space: Make sure you have enough space in the freezer to accommodate the cake while it sets.
- Crushed Oreos: For an extra crunchy texture, consider crushing the Oreos by hand or in a food processor.
- Sharp knife: Use a sharp knife to slice the cake easily. If needed, run the knife under hot water and wipe it dry to get clean cuts.
- Flavor variations: Try using different ice cream flavors such as chocolate, peanut butter, or mint for a fun twist on the traditional cookies and cream flavor.
Variations to Try
- Layer different flavors: Swap out the vanilla ice cream for chocolate, coffee, or even mint chocolate chip for a unique twist.
- Homemade fudge: If you have extra time, make your own hot fudge for a richer flavor.
- Top it off: Add sprinkles, chocolate shavings, or mini Oreos for added flair.
Frequently Asked Questions (FAQs)
Can I use store-bought ice cream?
Yes! Store-bought vanilla and cookies and cream ice cream work perfectly in this recipe. Allow it to soften before assembling the cake.
Can I make this cake ahead of time?
Yes, this ice cream cake is an excellent make-ahead dessert. You can make it the day before and freeze it until you’re ready to serve.
Can I substitute other cookies for the Oreos?
Yes, feel free to use other cookies, but Oreos give the best crunch and flavor for this recipe.
How do I prevent the ice cream from melting during assembly?
Freeze your pan and keep the ice cream layers firm as you assemble each part of the cake. Working quickly also helps.
Can I use chocolate sauce instead of chocolate shell?
While chocolate sauce won’t freeze like chocolate shell, it can still be used. Just be sure to coat the crunchies well before adding them to the cake.
How to Store and Reheat
Store the finished, uncut cake in the freezer for up to one week. For leftovers, wrap the cut sides in plastic wrap and keep in the freezer for up to 7 days.
Conclusion
This Oreo Ice Cream Cake is a showstopper for any occasion. With layers of rich ice cream, a crispy cookie crunch, and smooth whipped cream, it’s the perfect treat for ice cream lovers. Whether you’re celebrating a birthday or hosting a BBQ, this cake will surely impress your guests. Don’t forget to follow Ava Foodie on Pinterest for more delicious recipes like this one!